Art

Exploring the Enchanting World of Mahimagicdoll999999 Archives

"An enchanting doll with blue hair, large expressive eyes, and fairy wings, adorned with a flower crown and floral dress, sitting on a tree stump. The image captures a whimsical blend of fantasy and intricate craftsmanship, symbolizing the artistic style and charm of the Mahimagicdoll999999 Archives."

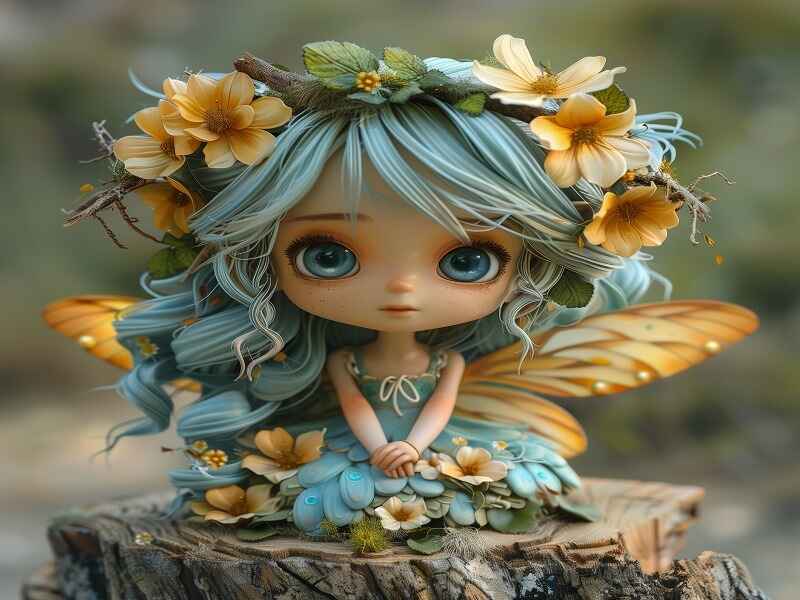
Introduction The mahimagicdoll999999 archives are a remarkable collection of dolls and digital art that captures the imagination of enthusiasts worldwide. This digital treasure trove showcases creativity, craftsmanship, and the evolution of doll-making and digital artistry. It is a hub for collectors, artists, and hobbyists, offering something captivating for everyone. The Birth of Mahimagicdoll999999 Archives The origins of the mahimagicdoll999999 archives can be traced back to a passionate collector with a unique vision. The collector, known as “Mahimagic,” started gathering rare dolls from flea markets, antique shops, and online platforms. What began as a small personal collection soon transformed into a globally recognized digital archive. The mission was simple: to create a space where collectors and artists could explore, learn, and appreciate the artistry behind every piece. The Collection: A Walk Through Time and Art The Mahimagicdoll999999 Archives house a diverse range of collectibles, spanning multiple eras, regions, and artistic styles. The collection features: Vintage dolls from the early 20th century Fashion dolls with intricate details Custom designs from contemporary artists Limited edition pieces signed by the creators Each doll tells its own story, reflecting the cultural and artistic influences of its time. For instance, some dolls highlight the elegance of the Victorian era, while others embrace modern styles with vibrant colors and bold designs. Why the Mahimagicdoll999999 Archives Matter The significance of the mahimagicdoll999999 archives goes beyond aesthetics. This collection serves as a cultural repository, preserving the artistry and history of doll-making for future generations. It fosters a deeper appreciation of the art of doll-making, showing how dolls can represent changing social norms, artistic movements, and historical moments. Points to Consider: Cultural Reflection: Dolls mirror society’s values and trends over time. Artistic Expression: They showcase the creativity and skill of different generations of craftsmen. Historical Context: Every piece offers insight into its era, making it more than just a toy. From Collecting to Curating: Building the Archives Collecting these unique items is only the first step. Curating and preserving them is what makes the Mahimagicdoll999999 Archives special. The team employs meticulous research, sourcing, and cataloging to maintain the integrity of each item. They also use advanced preservation techniques, such as digitization and climate-controlled storage, to protect the collection. This ensures that the archives remain accessible and intact for researchers, educators, and enthusiasts. Expanding to Digital Art: A Creative Evolution In addition to the physical collection, mahimagicdoll999999 archives have also ventured into the realm of digital art. This transition began on online forums where early digital sketches gained popularity. By embracing digital tools like Photoshop and Procreate, the artist developed a distinct style characterized by vibrant colors and fantasy elements. What Makes the Digital Art Unique? Fantasy-inspired themes: Surreal landscapes and mythical creatures. Attention to detail: Every digital piece is filled with intricate textures and bold hues. Emotional storytelling: Blending reality and fantasy to evoke wonder. Building a Community of Enthusiasts A key strength of the Mahimagicdoll999999 Archives is its vibrant community. By regularly engaging followers through live sessions, comments, and interactive features, the archives have fostered a loyal fanbase. This community is not just passive spectators—they actively contribute through suggestions, fan art, and collaborations. For example, one follower’s idea for a new fantasy character inspired a whole series of digital art pieces, showcasing the power of community input. Caring for Your Own Doll Collection If you’re inspired to start your collection, here are some tips: Start small: Begin by collecting pieces that resonate with you. Research: Learn about different doll types, historical significance, and value. Join communities: Engage with other collectors online or at exhibitions. Proper Care and Maintenance Maintaining a doll collection requires proper care to preserve its beauty and value. Here’s what you can do: Use clean hands when handling to prevent damage. Store in a climate-controlled environment to avoid deterioration. Dust regularly using a soft cloth to maintain their pristine condition. For more delicate or older pieces, professional restoration is recommended. The Future of the Mahimagicdoll999999 Archives Looking forward, the Mahimagicdoll999999 Archives are set to expand their digital presence and explore new technologies. Plans include incorporating virtual reality experiences, enhancing the website’s functionality, and collaborating with more artists globally. This will create a more immersive experience for visitors, allowing them to interact with the collection like never before. Conclusion: A Legacy of Art and Inspiration The Mahimagicdoll999999 Archives are more than just a collection—they are a testament to creativity, culture, and community. From rare dolls to mesmerizing digital art, the archives celebrate the power of artistry in all its forms. As the archives continue to grow and evolve, they remain a beacon for those who appreciate the magic of artistic expression. Whether you’re a seasoned collector, a budding artist, or simply someone with a passion for creativity, the Mahimagicdoll999999 Archives offer endless inspiration. Explore, engage, and be enchanted by the world of mahimagicdoll999999. Read more FAQs What makes the Mahimagicdoll999999 Archives unique compared to other digital collections? The Mahimagicdoll999999 Archives stand out because they seamlessly blend traditional doll collecting with modern digital art. They preserve rare physical dolls while exploring new digital mediums, offering a unique experience for collectors and digital art enthusiasts alike. This combination of physical and digital artistry creates a distinctive collection that captures cultural history, artistic evolution, and creative storytelling. How can I access the Mahimagicdoll999999 Archives? You can access the Mahimagicdoll999999 Archives online through their digital platform, where you can explore the collection, view digital art, and engage with the community. They also feature some special pieces and artifacts in virtual exhibits or collaborate with other institutions to showcase them. What types of artifacts are featured in the Mahimagicdoll999999 Archives? The archives feature a diverse range of collectibles, including vintage dolls from the early 20th century, fashion dolls with intricate details, custom designs from contemporary artists, and limited edition pieces signed by the creators. Each item represents a blend of artistic styles, cultural influences, and historical significance, making the collection a rich tapestry of both physical and digital artistry. Who is the artist

Exploring the Enchanting World of Mahimagicdoll999999 Archives Read More »

Kawaii Cute Wallpapers: Make Your Screen Adorable

"A kawaii-style image featuring a cute pink kitten with large, expressive eyes, set in a vibrant, whimsical background with soft lighting and pastel-colored leaves, capturing the essence of the kawaii aesthetic."

Introduction Imagine unlocking your device and being welcomed by a wallpaper full of vibrant colours, adorable characters, and charming designs. This is the magic of kawaii:kxkzate62mc= cute wallpapers Kawaii wallpapers aren’t just visually appealing; they bring joy and positivity into your daily digital routine. The kawaii aesthetic can instantly lift your mood, whether a pastel-coloured landscape or a character with big, sparkling eyes. Kawaii, a Japanese term for “cute,” embodies a sense of joy, warmth, and innocence. This style originated in Japan and has become a global trend, influencing art, fashion, and technology. This article explores the world of kawaii:kxkzate62mc= cute wallpapers, their impact, and how they can transform your screens into happy spaces. What Makes Kawaii: Cute Wallpapers So Popular? Kawaii= cute wallpapers are popular for a reason: they make people happy! These wallpapers use soft colours, rounded shapes, and exaggerated features to create a delightful, friendly atmosphere. They appeal to our sense of playfulness and remind us of the joy of simple pleasures. Unlike other styles, kawaii wallpapers often feature pastel palettes, joyful characters, and playful patterns. They aren’t just for children—adults love them too! With kawaii, it’s all about spreading happiness and positivity through tiny moments of cuteness. The Core Elements of Kawaii: Cute Wallpapers To capture the kawaii style perfectly, wallpapers usually include certain key elements: Pastel Color Schemes: Light pinks, blues, and yellows dominate. Cute Characters: Oversized eyes, small mouths, and innocent expressions. Playful Themes: Think of adorable food items, small animals, and fantasy creatures. Each design element combines to create a charming and irresistible overall effect. Example: Consider a wallpaper with a smiling panda holding a heart—simple, but it instantly makes you smile. Why Should You Choose Kawaii Wallpapers for Your Devices? 1. Boost Your Mood: Whenever you see a happy, smiling character, it boosts your mood. For example, a cute bunny with a bow tie can instantly cheer you up. 2. Personal Expression: Kawaii wallpapers reflect your personality. Whether you love animals, food, or fantasy themes, there’s a kawaii design for everyone. 3. Stress Relief: Research shows that viewing cute images can lower stress. Having a kawaii= cute wallpaper on your screen can bring comfort during a hectic day. Popular Themes in Kawaii: Cute Wallpapers There are countless themes in kawaii= cute wallpapers. Here are some of the most loved: Animal-Themed Wallpapers: Cats, dogs, rabbits, and even pandas with exaggerated features and playful poses. Food-Themed Wallpapers: Imagine a smiling cupcake or a happy ice cream cone. These wallpapers add a dash of sweetness to your screen. Fantasy and Magical Designs: Unicorns, fairies, and stars bring your device a sense of wonder and magic. Seasonal Themes: Change your wallpaper to match the seasons. Think cherry blossoms for spring or cosy animals wrapped in scarves for winter. Tips for Finding the Perfect Kawaii Wallpaper When looking for the suitable wallpaper, keep these tips in mind: Choose High-Resolution Images: To avoid blurry backgrounds, always go for high-quality, high-resolution images. Match Your Device’s Size: A wallpaper that looks great on your phone might not work for your tablet. Find one that fits your screen perfectly. Select a Theme that Reflects Your Mood: Are you feeling playful? Go for animals. Want something calming? Choose pastel abstract designs. Best Platforms for Kawaii Wallpapers Finding kawaii wallpapers is easier than ever! Here are some great platforms to explore: Pinterest: Search “kawaii wallpapers” and scroll through endless options. DeviantArt: Discover unique and custom kawaii art from talented creators. WallpaperAccess & Wallhaven: Both sites offer high-quality images that cater to different tastes. Social Media Communities: Platforms like Instagram and Tumblr are full of kawaii art shared by fans worldwide. DIY: How to Create Your Own Kawaii Wallpapers Are you feeling creative? Why not design your kawaii= cute wallpaper? Here’s a simple guide: Choose a Theme: Pick something that makes you happy—maybe cute animals or a dreamy pastel landscape. Use a Design Tool: Canva, Procreate, or Adobe Illustrator are great for beginners and professionals. Incorporate Kawaii Elements: Add a big-eyed character, pastel backgrounds, and cute patterns like hearts or stars. Save and Set it as Your Wallpaper: Once finished, save it in high resolution and set it as your device background. The Future of Kawaii: Cute Wallpapers With technology evolving, the world of kawaii= cute wallpapers is also expanding. Expect more animated kawaii backgrounds, interactive wallpapers, and even AR-enhanced designs that react to your movements. Conclusion Embracing Kawaii culture through wallpapers can transform your digital experience. Whether you’re looking to reduce stress, express yourself, or bring a smile to your face, kawaii:kxkzate62mc= cute wallpapers are a perfect choice. So go ahead—find that ideal pastel-coloured character, download your favourite design, and let the charm of Kawaii brighten your day! Read more  

Kawaii Cute Wallpapers: Make Your Screen Adorable Read More »

The Ultimate Guide to Drawing a Skull

drawing:oldj_7nsvxk= skull

Introduction When it comes to the world of art, few subjects are as intriguing and captivating as the skull. drawing:oldj_7nsvxk= skull not only hones your artistic skills but also allows you to explore themes of mortality, beauty, and the macabre. In this guide, we’ll delve deep into everything you need to know about drawing:oldj_7nsvxk= skull, providing a comprehensive step-by-step approach, helpful tips, and even some engaging anecdotes to enrich your understanding. Why Draw a Skull? Before we dive into techniques, let’s discuss why skulls are a popular subject for artists. The skull symbolizes a multitude of concepts: life, death, and even rebirth. Artists throughout history have embraced the skull for its complexity and beauty. For example, the iconic works of Vincent van Gogh often featured skulls, showcasing the delicate balance between life and death. Drawing a skull can serve as a reminder of our mortality and the beauty that lies within that understanding. A Personal Anecdote I remember the first time I attempted to draw a skull. I was a teenager, excited about exploring the world of art. Armed with a pencil and a sketchpad, I thought it would be an easy task. However, as I started, I quickly realized the intricacies involved—the shadows, the contours, and the delicate balance of light. This challenge transformed my initial excitement into a fascinating journey of discovery. Materials You’ll Need Before starting your journey into drawing:oldj_7nsvxk= skull, gather the following materials: Pencils: A range of pencils (2H for fine lines, HB for general drawing, and 4B or 6B for shading). Eraser: A kneaded eraser works best for subtle corrections. Sketch Paper: Choose quality paper that can handle erasing and shading. Reference Images: Having images from different angles will help improve your accuracy. Step-by-Step Guide to Drawing a Skull Step 1: Basic Shapes Begin by sketching the basic shapes that form the skull. Use light pencil strokes so that you can easily erase and refine as you go. Start with an oval for the cranium and a smaller shape for the jaw. Step 2: Outline the Jaw and Cheekbones Next, refine the shape of the skull by adding the jawline and cheekbones. This step is crucial for giving your skull character. Notice how the cheekbones protrude, and try to visualize how the skull connects at the jaw. Step 3: Eye Sockets and Nose Cavity Add the eye sockets, which are typically large and rounded, and the nasal cavity, which should resemble an inverted heart shape. Pay attention to the proportions here, as they will set the tone for your drawing. Step 4: Add Details Now it’s time to add more details. Sketch the teeth by outlining the upper and lower jaw. Remember to capture the spaces between them, as this adds realism. Consider adding texture to the skull’s surface for a more lifelike appearance. Step 5: Shading Techniques Shading is where your drawing will come to life. Use a softer pencil (like 4B or 6B) to add depth and dimension. Focus on the areas where shadows naturally fall, such as under the cheekbones and within the eye sockets. Step 6: Final Touches Once you’re satisfied with the shading, take a step back and evaluate your drawing. Use your eraser to highlight areas where light would hit the skull, such as the forehead and the tops of the cheekbones. This contrast will create a more dynamic piece. Tips for Improving Your Skull Drawing Skills Practice Regularly: The more you practice, the better you’ll become. Make it a goal to draw a skull at least once a week. Study Anatomy: Understanding the anatomy of the skull can enhance your drawings significantly. Consider looking into anatomy books or online resources. Experiment with Styles: Don’t be afraid to try different artistic styles, from hyper-realistic to abstract interpretations. Each style offers unique insights into how to approach drawing:oldj_7nsvxk= skull. Seek Feedback: Share your work with others, whether it’s friends, family, or an online art community. Constructive criticism can help you see your work from different perspectives. Conclusion drawing:oldj_7nsvxk= skull is more than just an artistic exercise; it’s an exploration of deeper themes that resonate with many artists. Through this guide, you now have a roadmap to embark on your journey of skull drawing. Remember, art is about personal expression, so let your unique perspective shine through in your work. By following these steps and tips, you’ll not only improve your skills but also gain a greater appreciation for the beauty and complexity of the human skull. So grab your pencil, find your reference images, and start creating! Read more

The Ultimate Guide to Drawing a Skull Read More »

Your Guide to Drawing Basketball: Unlock Your Creativity

Introduction Drawing is a fantastic way to express your love for sports, and drawing:cul23ybyzfm= basketball is no exception. Whether you’re a beginner or an experienced artist, this guide will help you understand the nuances of drawing:cul23ybyzfm= basketball players, the game itself, and the overall vibe that comes with this dynamic sport. Let’s dive in! Understanding the Basics of Basketball Drawing Before you start sketching, it’s essential to grasp the fundamentals of both basketball and drawing. The Essence of Basketball Basketball is not just a game; it’s an emotion. The swish of the net, the dribble of the ball, and the roar of the crowd create a unique atmosphere that can inspire any artist. Imagine the vibrant colors of team jerseys, the excitement of a slam dunk, and the intensity of a buzzer-beater. Why Draw Basketball? Drawing basketball helps you capture these moments. It’s not just about the physical act of drawing but also about expressing your passion for the sport. Whether it’s for a personal project or to decorate your space, drawing:cul23ybyzfm= basketball can be incredibly fulfilling. Step-by-Step Guide to Drawing a Basketball Player Step 1: Gather Your Materials Before you begin, make sure you have all your drawing materials. You’ll need: Pencils (HB and 2B) Eraser Sketchbook or drawing paper Ruler (optional for straight lines) Reference images of basketball players Step 2: Choose Your Pose Select a dynamic pose to make your drawing:cul23ybyzfm= basketball lively. Look at reference images or videos of players performing different moves like shooting, dribbling, or dunking. Choosing a well-defined pose will bring energy to your artwork. Step 3: Sketch the Basic Shapes Start by breaking down the player into basic shapes. Use circles for the head and joints, and rectangles or ovals for the torso and limbs. This technique is known as gesture drawing and helps in achieving proportionate figures. Step 4: Define the Outline Once you’re happy with the basic shapes, begin refining your sketch. Focus on the contours of the body and clothing. This is where you can add details like the jersey number and the texture of the basketball. Step 5: Add Details Now it’s time to infuse life into your basketball drawing. Add facial features, muscles, and clothing folds. Pay special attention to the hands and feet, as these are crucial for depicting action. Step 6: Shading and Texturing Shading adds depth to your drawing. Use your 2B pencil to create shadows, especially under the arms, beneath the basketball, and around the legs. Blend your pencil strokes for a smoother finish. Step 7: Final Touches After shading, take a step back and evaluate your artwork. Make any necessary adjustments and clean up any stray lines. You can also add a background scene, like a basketball court or cheering fans, to set the atmosphere. Adding Personality to Your Basketball Drawing Use Colors Wisely If you’re working with colored pencils or markers, choose vibrant colors that represent the team. This not only adds life to your drawing but also makes it relatable to fans. Include Action Elements Consider adding elements like a flying basketball or motion lines to show movement. This gives your drawing a sense of action and excitement, making it more engaging. Anecdote: The Inspiration Behind My First Basketball Drawing I still remember the day I decided to draw my first basketball player. It was during a finals game, and I was captivated by a player making a last-second shot. The energy in the arena was electric, and I wanted to capture that moment. After watching the replay several times, I grabbed my sketchbook and got to work. The result was a messy but passionate representation of that exhilarating moment, and it ignited my love for drawing basketball. Common Mistakes to Avoid in Basketball Drawing Overcomplicating the Pose: Start with simple poses. You can gradually move to more complex stances as you gain confidence. Ignoring Proportions: Always keep the basic anatomy in mind. Players have unique body types, but maintaining proportions is key. Neglecting Practice: Drawing is a skill that improves with practice. Don’t be discouraged by initial attempts. Conclusion Creating a compelling drawing:cul23ybyzfm= basketball is about more than just putting pencil to paper; it’s about capturing the spirit of the game. By following this guide, you’ll not only improve your drawing skills but also deepen your appreciation for basketball. Remember, the more you draw, the better you become. So grab your materials, find some inspiration, and let your creativity flow. Whether you’re sketching a famous player or an imaginary slam dunk, enjoy the process and have fun with it! Read more

Your Guide to Drawing Basketball: Unlock Your Creativity Read More »

Cool Drawings: A Comprehensive Guide

The image shows a detailed flower drawing with a pen beside it. No text is visible.

Introduction Drawing is a wonderful way to express creativity and emotion. Whether you’re a beginner or an experienced artist, experimenting with cool drawings can be a thrilling experience. In this article, we’ll explore various techniques, styles, and tips to create stunning cool:4299q_zwwlo= drawings that capture attention and imagination. Drawing is an art form that allows you to convey ideas without words. The term “cool” can be subjective, as what one person considers cool may vary for another. However, there are common themes, trends, and designs in cool:4299q_zwwlo= drawings that generally appeal to a broader audience. Table of Contents: What Makes a Drawing “Cool”? Essential Tools for Cool Drawings Drawing Techniques: From Sketching to Shading Step-by-Step Guide to Create Your Own Cool Drawing Popular Themes in Cool Drawings Anecdotes from Artists: Stories Behind Cool Creations Conclusion: Bringing Your Ideas to Life 1. What Makes a Drawing “Cool”? Cool drawings are those that stand out because of their creativity, originality, and often a unique twist that grabs attention. Whether it’s through intricate details, bold colors, or an abstract approach, cool:4299q_zwwlo= drawings evoke a sense of awe. But what truly defines the “cool factor”? Let’s break it down: Originality: Drawing something fresh or presenting a new take on a familiar subject can make it stand out. Skill: A skilled hand is often behind the coolest drawings. Even a simple concept, when executed with precision, becomes eye-catching. Use of Color and Texture: Vibrant colors, unique textures, or clever shading techniques can elevate any artwork. Personal Connection: Drawings that resonate with personal experiences or emotions often appear more authentic, adding to their “cool” factor. When considering cool drawings, think of examples such as graffiti art, comic book illustrations, or surrealism — these often embody a sense of boldness and innovation. Semantic SEO Keywords: Artistic cool drawings Creative sketch designs Intricate pencil drawings 2. Essential Tools for Cool Drawings Before diving into drawing techniques, let’s explore the tools that can make your cool drawings pop. Basic Tools: Pencils: Graphite pencils are the most versatile tools in an artist’s arsenal. Choose from a range of hardness (2H for fine details, 6B for deep shading). Erasers: A kneaded eraser is essential for highlighting and correcting mistakes without smudging. Paper: Heavyweight paper is ideal for drawing because it can handle both light sketches and deep shading. Additional Tools: Colored Pencils: For cool, vibrant sketches, colored pencils provide endless possibilities. Fine Liners: Ideal for outlining or adding intricate details. Blending Stumps: These help in smooth shading transitions. Having the right tools can make the difference between an ordinary and a truly cool drawing. 3. Drawing Techniques: From Sketching to Shading Drawing is about mastering basic techniques before advancing to complex illustrations. Let’s explore some essential methods to help you enhance your cool:4299q_zwwlo= drawings. a. Sketching: Sketching is the foundation of any drawing. Start with light, loose strokes to map out the structure of your subject. Avoid pressing hard on the pencil during this stage, as it makes erasing difficult. b. Outlining: Once you’re satisfied with your sketch, go over the lines with a firmer hand. You can also use fine liners to create clean, bold outlines that will give your drawing more definition. c. Shading: Shading brings depth to your artwork. Here’s a step-by-step approach to mastering shading: Identify the light source: Determine where the light is coming from in your drawing. Apply light shading: Begin shading in areas where the light is minimal. Build layers: Gradually apply more pressure to darken areas that are furthest from the light. Blend: Use blending stumps to smooth out the transitions between light and dark areas. d. Cross-hatching: This is an advanced shading technique where lines are drawn closely together. The denser the lines, the darker the area will appear. Cross-hatching adds texture and dimension, making your drawings cooler. 4. Step-by-Step Guide to Create Your Own Cool Drawing Now that you’re familiar with the basics, let’s dive into creating your first cool:4299q_zwwlo= drawings. Follow this simple guide: Step 1: Choose Your Subject Start by picking something that excites you. Cool drawings often reflect subjects that captivate the artist, so choose wisely. Step 2: Light Sketch Using a pencil, lightly sketch the outline of your subject. Don’t worry about perfection at this stage—this is just the groundwork. Step 3: Define the Outlines Once your sketch feels solid, go over the lines with a fine liner or a darker pencil. Add details where necessary, but keep your lines clean. Step 4: Begin Shading Identify where your light source is and start shading the areas that need shadow. Use blending stumps for smooth transitions, and cross-hatching if you want a textured look. Step 5: Add Colors (Optional) If you’re going for a colored drawing, now’s the time to add colored pencils or markers. Focus on blending colors for a gradient effect or keep them bold for a striking contrast. Step 6: Finishing Touches Finally, take a step back and assess your drawing. Are there any areas that need more definition or shading? Tweak it until you’re satisfied! 5. Popular Themes in Cool Drawings Themes play a significant role in cool drawings. Here are a few common themes that tend to attract attention: a. Fantasy Worlds Dragons, mythical creatures, and enchanted forests often find their way into cool drawings. Fantasy art lets your imagination run wild. b. Abstract Abstract art is where cool drawings truly shine. This style allows for a lot of creative freedom, with random shapes and patterns forming a cohesive whole. c. Graffiti Graffiti is a form of street art that’s often bold, colorful, and rebellious. It’s one of the most recognizable forms of cool drawing. d. Cartoon Characters Classic cartoon characters from television shows and movies make for fun and cool drawing subjects. From superheroes to animated animals, these subjects often evoke nostalgia and a playful vibe. 6. Anecdotes from Artists: Stories Behind Cool Creations As I was learning to draw, one of my favorite memories was sketching a dragon while sitting in a park.

Cool Drawings: A Comprehensive Guide Read More »

How about: “Coloring: Get Creative with Drawings”?

colorear:6nxitgiwv1i= dibujos

Introduction Colorear:6nxitgiwv1i= dibujos, or coloring drawings, is a timeless activity enjoyed by people of all ages. Whether you’re looking for a relaxing hobby or a fun activity for kids, colorear:6nxitgiwv1i= dibujos offers numerous benefits. This article explores the joys of coloring, provides a comprehensive guide on getting started, and shares tips for enhancing your coloring experience. Why Color? The Benefits of Colorear:6nxitgiwv1i= Dibujos Coloring isn’t just for kids. Adults are increasingly discovering the benefits of colorear:6nxitgiwv1i= dibujos as well. Here’s why you might want to pick up some crayons or markers: Stress Relief: Coloring has been shown to reduce stress and anxiety. The repetitive motion of coloring and the focus required can serve as a form of mindfulness, much like meditation. Enhanced Creativity: By choosing colors and creating designs, you engage your creative side. This can translate to improved problem-solving skills and innovative thinking in other areas of life. Improved Focus and Coordination: For children, colorear:6nxitgiwv1i= dibujos helps in developing fine motor skills and hand-eye coordination. For adults, it can enhance concentration and attention to detail. Getting Started with Colorear:6nxitgiwv1i= Dibujos To begin your journey into the world of colorear:6nxitgiwv1i= dibujos, you’ll need some basic supplies. Here’s what you should gather: Coloring Books: Choose from a variety of themes such as animals, nature, mandalas, or abstract patterns. The choice of theme can make the experience more enjoyable and tailored to your interests. Coloring Tools: You can use colored pencils, markers, crayons, or gel pens. Each tool provides a different texture and finish, so experimenting with different ones can be part of the fun. Paper: Opt for high-quality paper that can handle different coloring tools without bleeding. This is especially important if you are using markers or watercolor pencils. Step-by-Step Guide to Colorear:6nxitgiwv1i= Dibujos Here’s a simple guide to help you get started with colorear:6nxitgiwv1i= dibujos: Choose Your Design: Pick a drawing that appeals to you. Whether it’s a detailed mandala or a simple cartoon, the key is to choose something that excites you. Prepare Your Workspace: Find a comfortable spot with good lighting. Arrange your tools so you have everything you need within reach. Select Your Colors: Decide on a color scheme. You might want to follow a theme or let your creativity guide you. Experiment with different combinations to see what works best. Start Coloring: Begin by filling in the larger areas with your chosen colors. Work from light to dark shades to create depth and dimension in your drawing. Add Details: Once the main areas are colored, go back and add details. Use fine-tipped pens or pencils to enhance intricate parts of the drawing. Final Touches: Review your work and make any final adjustments. Adding a touch of shading or blending can enhance the overall effect. Advanced Techniques for Colorear:6nxitgiwv1i= Dibujos As you become more experienced with colorear:6nxitgiwv1i= dibujos, you might want to try some advanced techniques: Layering: Apply multiple layers of different colors to create rich textures. This technique can add depth and complexity to your coloring. Blending: Use blending tools or techniques to merge colors smoothly. This can create beautiful gradients and transitions in your artwork. Texturing: Experiment with different strokes and patterns to add texture. This can give your drawing a unique and personalized touch. Anecdote: The Unexpected Joy of Coloring I remember the first time I picked up a coloring book after years of not doing so. It was a random choice—one rainy afternoon, feeling a bit nostalgic, I decided to try it out. I chose a vibrant floral design and, to my surprise, found myself completely absorbed in the process. The colors seemed to come alive, and hours passed without me even realizing it. It was in that moment that I rediscovered the simple joy and therapeutic benefits of colorear:6nxitgiwv1i= dibujos. Tips for Maximizing Your Colorear:6nxitgiwv1i= Dibujos Experience Be Patient: Take your time and enjoy the process. Coloring is as much about the journey as it is about the final result. Explore Different Styles: Try out various coloring books and tools to find what works best for you. Each style and medium offers a new experience. Join a Community: Connect with other coloring enthusiasts online or in local groups. Sharing your work and getting feedback can be both inspiring and motivating. Conclusion Colorear:6nxitgiwv1i= dibujos offers a wonderful way to relax, enhance creativity, and develop fine motor skills. Whether you’re a beginner or an experienced colorist, there’s always something new to explore in the world of coloring. By following the tips and techniques outlined in this guide, you’ll be able to make the most out of your colorear:6nxitgiwv1i= dibujos experience and enjoy every moment of this creative and fulfilling activity. Read more

How about: “Coloring: Get Creative with Drawings”? Read More »

The Ultimate Guide to Clip Art= Sun: Brightening Up Your Designs

clip art:ep0s_7wrfwa= sun

Introduction When it comes to designing eye-catching visuals, clip art:ep0s_7wrfwa= sun can be a game-changer. Whether you’re working on a vibrant flyer, a playful poster, or an engaging website, incorporating clip art= sun can add a touch of warmth and cheerfulness to your project. In this guide, we’ll explore the various aspects of clip art:ep0s_7wrfwa= sun including its benefits, how to use it effectively, and practical tips to get the most out of it. Understanding Clip Art= Sun Clip art= sun refers to digital images or illustrations depicting the sun, used to enhance visual content. These images are often simplistic yet expressive, making them perfect for a range of applications. From conveying a sunny day to symbolizing warmth and energy, clip art:ep0s_7wrfwa= sun can play a significant role in visual storytelling. The Appeal of Clip Art= Sun One of the primary reasons for the popularity of clip art:ep0s_7wrfwa= sun is its versatility. Here are a few reasons why it’s a favorite among designers: Visual Appeal: The sun is a universally recognizable symbol that instantly conveys positivity and brightness. Simplicity: The clean, simple lines of clip art:ep0s_7wrfwa= sun make it easy to incorporate into various design styles without overwhelming the viewer. Emotional Impact: A clip art= sun can evoke feelings of warmth, happiness, and optimism. How to Use Clip Art= Sun Effectively Incorporating clip art= sun into your designs requires a bit of strategy to ensure it complements rather than clashes with your overall design. Here’s a step-by-step guide to using clip art:ep0s_7wrfwa= sun effectively: 1. Choose the Right Style Clip art= Sun comes in various styles, from minimalist icons to detailed illustrations. Select a style that aligns with the theme and tone of your project. For instance, a cartoonish clip art:ep0s_7wrfwa= sun may work well for children’s materials, while a more realistic version might suit professional presentations. 2. Consider Placement Where you place your clip art= sun can significantly impact its effectiveness. Consider placing it in a corner to draw attention without dominating the main content. Alternatively, you might use it as a background element to subtly enhance the design. 3. Match Colors Ensure that the colors in your clip art:ep0s_7wrfwa= sun harmonize with your overall color scheme. You can adjust the color of the clip art= sun to match your palette, ensuring it blends seamlessly with the rest of the design. 4. Adjust Size The size of the clip art= sun should be proportional to the other elements in your design. Too large, and it may overpower the content; too small, and it might go unnoticed. Aim for a balance that enhances rather than distracts. 5. Experiment with Effects Adding effects like shadows, gradients, or outlines can give your clip art= sun more depth and make it stand out. Experiment with different effects to see what works best for your specific design needs. Practical Tips for Using Clip Art= Sun Here are some practical tips to help you make the most of clip art:ep0s_7wrfwa= sun in your designs: Keep It Simple: Sometimes less is more. Use clip art= sun sparingly to avoid cluttering your design. Use High-Quality Images: Ensure that the clip art= sun you use is of high quality to maintain a professional look. Combine with Other Elements: Don’t hesitate to pair clip art:ep0s_7wrfwa= sun with other graphics or text to create a cohesive design. Anecdote: Brightening Up a Community Event A local community organizer wanted to promote their annual summer festival. They chose to use clip art= sun in their promotional materials. By selecting a bright, cheerful clip art:ep0s_7wrfwa= sun and integrating it into the event’s flyer, they successfully conveyed the festival’s fun, sunny atmosphere. The result? Increased attendance and a vibrant buzz around the event. Conclusion Incorporating clip art:ep0s_7wrfwa= sun into your designs can bring a touch of brightness and joy to your projects. By choosing the right style, considering placement, and experimenting with effects, you can effectively use clip art= sun to enhance your visual content. Remember to keep it simple, use high-quality images, and combine it with other elements for the best results. With these tips, you’ll be well on your way to creating stunning designs that shine! Read more

The Ultimate Guide to Clip Art= Sun: Brightening Up Your Designs Read More »

The Fascinating World of Furry Art: An In-Depth Guide

art:i3gj_j6mfva= furry

Introduction In recent years, art:i3gj_j6mfva= furry has gained considerable popularity, capturing the imaginations of many artists and enthusiasts alike. This unique genre combines elements of anthropomorphism with vibrant, often whimsical illustrations. Whether you’re a seasoned artist or someone curious about this creative field, understanding art:i3gj_j6mfva= furryt can be both enlightening and enjoyable. What Is Furry Art? At its core, art:i3gj_j6mfva= furry involves artistic expressions featuring anthropomorphic characters—animals with human traits. This could range from a fox with human-like emotions to a dragon with a personality. The appeal of furry art lies in its ability to blend the fantastical with the relatable, creating characters that resonate on a personal level. The Origins of Furry Art Furry art has roots in early science fiction and fantasy fandoms. As these communities grew, so did the artistic expressions that accompanied them. The term “furry” itself became popular in the late 20th century, and with it, a vibrant subculture developed around creating and appreciating anthropomorphic art. Key Characteristics of Furry Art Furry art is characterized by: Anthropomorphic Characters: Animals with human characteristics, such as the ability to speak, wear clothes, or express complex emotions. Vivid Imagery: Bright colors and imaginative settings that bring these characters to life. Diverse Styles: From realistic depictions to abstract designs, art:i3gj_j6mfva= furry encompasses a wide range of artistic styles. Why People Love Furry Art The appeal of furry art is multifaceted. For many, it’s about escape and fantasy, allowing them to explore different identities and worlds. Others appreciate the artistry involved and the community that shares their passion. Anecdotal evidence suggests that people find solace and joy in creating or enjoying art:i3gj_j6mfva= furry, as it offers a unique way to connect with others and express oneself. A Personal Anecdote Take, for instance, the story of Emily, a graphic designer who discovered furry art through a friend’s online community. Initially skeptical, she found herself captivated by the creativity and dedication of the artists. Emily began experimenting with her own furry art, which led to a newfound passion and a deeper appreciation for the genre. Getting Started with Furry Art If you’re intrigued by furry art and want to dive in, here’s a step-by-step guide to help you get started: 1. Understanding the Basics Before creating your own art:i3gj_j6mfva= furry, it’s crucial to familiarize yourself with the basics. Research different styles and genres within furry art to find what resonates with you. 2. Gather Inspiration Browse online forums, social media platforms, and art websites to gather inspiration. Websites like DeviantArt and Fur Affinity are excellent places to see various styles. 3. Choose Your Tools Depending on whether you prefer traditional or digital art, gather the necessary tools. For digital art, software like Adobe Photoshop or Procreate can be invaluable. For traditional art, high-quality pencils, paints, and paper are essential. 4. Start Sketching Begin by sketching your anthropomorphic characters. Focus on getting the basic shapes and proportions right. Remember, practice makes perfect! 5. Develop Your Style As you become more comfortable with art:i3gj_j6mfva= furry, start developing your own style. Experiment with different techniques and mediums to find what works best for you. 6. Share Your Work Once you’re satisfied with your creations, share them with the community. Platforms like social media and art forums can be great places to showcase your furry art and receive feedback. Advanced Techniques in Furry Art For those looking to refine their skills, here are some advanced techniques to consider: Dynamic Poses Creating dynamic poses can add life and energy to your art:i3gj_j6mfva= furry. Study how animals move and incorporate those elements into your characters. Detailed Textures Adding textures to your characters’ fur, clothing, and backgrounds can enhance the realism of your furry art. Techniques such as layering and blending can be very effective. Character Development Developing backstories and personalities for your characters can make your furry art more engaging. Think about their motivations, likes, and dislikes to bring them to life. Conclusion Furry art is a vibrant and evolving field that offers endless possibilities for creativity and self-expression. Whether you’re an artist looking to explore new styles or simply an enthusiast who enjoys the genre, understanding the nuances of furry art can enhance your appreciation and involvement. As you embark on your journey with art:i3gj_j6mfva= furry, remember to enjoy the process and connect with the community. With each piece, you’ll contribute to the rich tapestry of this unique artistic genre. Read more

The Fascinating World of Furry Art: An In-Depth Guide Read More »

The Beauty of Clip Art= Butterfly: A Creative Journey

clip art:rmvue89qthc= butterfly

Introduction In today’s digital world, clip art has become an essential tool for designers, students, and anyone looking to enhance their visual projects. One popular category in clip art is clip art:rmvue89qthc= butterfly, often sought after for its vibrant beauty and symbolism of transformation. This article will explore everything you need to know about clip art:rmvue89qthc= butterfly, how to use it effectively, and the magic it can bring to your projects. With step-by-step guidance, interesting anecdotes, and the right amount of technical insight, you’ll come to appreciate how butterfly clip art can elevate your designs. Understanding Butterfly Clip Art: A Brief Introduction Before diving into the specifics of clip art:rmvue89qthc= butterfly it’s essential to understand what clip art is. Clip art refers to pre-made images and graphics that can be inserted into a wide range of documents and digital projects. It’s a great resource for those who might not have the artistic skills or software knowledge to create custom illustrations from scratch. These images are easy to use and available in various styles—black and white, detailed sketches, or colorful designs. The Appeal of Butterfly Clip Art Why are butterflies such a popular theme in clip art? For many, the butterfly is a symbol of transformation, beauty, and freedom. Its vibrant colors and intricate patterns make it an appealing visual for a wide range of themes, from educational materials to invitations, flyers, and even corporate branding. In fact, butterflies represent hope, change, and rebirth, which are often themes in projects that need to convey inspiration or growth. Think about the last time you saw a butterfly fluttering by—it felt almost magical, right? That feeling translates perfectly into digital art, which is why clip art:rmvue89qthc= butterfly is widely loved. Its versatility makes it suitable for so many occasions. Types of Butterfly Clip Art Butterfly clip art comes in many different forms, styles, and formats. Whether you’re looking for something simple, complex, or abstract, you’ll find a range of options available online. 1. Hand-Drawn Butterfly Clip Art Hand-drawn butterfly clip art often has a more whimsical and artistic feel. These illustrations can vary in complexity, from simple line drawings to more detailed sketches. These are often used in children’s books, invitations, or more casual design projects. 2. Realistic Butterfly Clip Art If you’re aiming for something more realistic, you can find highly detailed butterfly clip art that mimics the actual colors and shapes of butterflies found in nature. This type is perfect for educational purposes, environmental projects, or anything needing a touch of authenticity. 3. Abstract Butterfly Clip Art Sometimes, you want something more abstract. Abstract butterfly clip art tends to be more conceptual and may use exaggerated shapes, colors, and patterns. These are often used in branding and modern design projects where you’re aiming for a more contemporary aesthetic. How to Use Butterfly Clip Art in Your Projects Using butterfly clip art can be a fun and creative process, but you want to ensure you’re using it in a way that complements your project. Below is a step-by-step guide to help you make the most of your butterfly clip art: Step 1: Determine the Purpose of Your Project Before diving into your collection of clip art, think about the tone and message of your project. Is it light and whimsical? Or is it more professional and serious? Choosing the right type of butterfly clip art to match your project’s purpose is essential. Step 2: Choose Your Style As we discussed, butterfly clip art comes in various styles—hand-drawn, realistic, and abstract. The style you choose should match the overall aesthetic of your project. For example, if you’re designing a wedding invitation, a delicate hand-drawn butterfly might be more suitable than a colorful abstract one. Step 3: Ensure High-Quality Resolution When working with digital art, resolution is crucial. Ensure the butterfly clip art you choose is high resolution to avoid pixelation, especially if you plan on printing it. Clip art that is vector-based is ideal because it can be scaled to any size without losing quality. Step 4: Incorporate Color Harmoniously Butterflies are known for their vibrant colors, so it’s important to make sure the colors of your clip art fit into your design’s color scheme. Be mindful not to overuse color, as this can make the design look busy or chaotic. Use butterflies as accents rather than the focal point unless that’s the intended design. Step 5: Placement and Balance Once you’ve chosen your butterfly clip art, consider its placement in your project. Butterflies are often used as decorative accents, so think about how to balance them with other elements in your design. Too many butterflies can make the design feel cluttered, while too few might leave it feeling incomplete. Anecdote: How Butterfly Clip Art Saved a Presentation I once had a colleague who was giving a presentation on the concept of transformation in business. Her slides were full of information but lacked any visual appeal. At the last minute, she added a few pieces of butterfly clip art, symbolizing the metamorphosis of ideas. The presentation instantly felt more engaging, and the butterflies added a memorable visual cue to reinforce her message. Enhancing Your Work with Butterfly Clip Art: Best Practices Here are some tips to help you take your use of clip art:rmvue89qthc= butterfly to the next level: Use It to Tell a Story Whether you’re creating a flyer or a blog post, clip art:rmvue89qthc= butterfly can help tell a story. Butterflies symbolize change, and you can use them to visually communicate this theme throughout your work. For example, start with a caterpillar image at the beginning of your design and gradually add butterflies to symbolize the completion of transformation. Add Animation for Digital Projects Butterflies are synonymous with movement, so consider using animated butterfly clip art for websites, presentations, or social media posts. A butterfly gently flapping its wings adds life to your design and can create a more dynamic visual experience for viewers. Use Butterfly Clip Art for Personalization Butterflies often evoke a

The Beauty of Clip Art= Butterfly: A Creative Journey Read More »